|
Sorry for the delay folks, but I've been busy helping my wife take care of our new baby girl! I'll get back to blogging as soon as possible. But while you're waiting, please stop by and vote for what you'd like to see in my bonus post on survival. I'll pick the top three voted items and give you my take on the subjects. You can vote here.
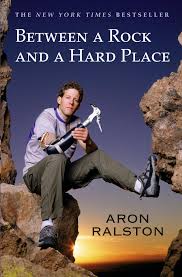
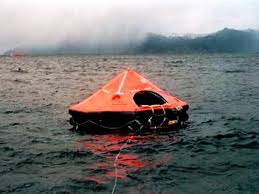
First off, thanks for hanging in there and being patient while life took over. I know it’s been a long time since I last posted, and I apologize. I saved this topic for last, because I think it’s one of the most important aspects to surviving a bad situation. Without the will to survive/live, the rest of your plan or training won’t amount to jack or shit. In this post, I’ll talk about what the will to survive is, how to foster a healthy mental attitude to grow your own will to survive, and share some stories that are good examples of this phenomenon. According to Dr. Lawrence Wilson, “The will to survive is the will to stay in one’s body and keep the body healthy and alive.” In other words, it’s the mental strength to endure despite tough odds and crap situations. It’s this will to keep on living that will help get you through the survival situation. You have to have a reason to keep on keepin’ on, or else you’ll give up, and then it’s game over. There was an entire module of training in my Air Force survival on this very topic. Plus in the survival manual they hand out to flyers deploying to a hostile environment, there is a section dedicated to it as well. It’s a real thing, and there are steps you can take to help strengthen your own will to survive. First and foremost, know that the will to survive is a mental muscle that ties in with physical conditions (it can also tie into spiritual factors if you are religious/spiritual). There are certain things you can do to help prepare and exercise this mental muscle, like prepare. Remember the Boy Scout motto of be prepared? You have to know your own limitations before you find yourself in a survival situation, and the best way to find those limitations, are to practice, exercise, and implement. You need to practice survival techniques. I’ve mentioned this before in other posts, but if you only rely on theory, you’re going to be hurting when it comes to time to try it for real. Practice building primitive shelters. Practice building fires with different materials in different weather patterns. Gathering and purifying water, or foraging for food. These are skills that you will need to survive, and if you know deep down that you can rely on your own skills to procure and produce these things, it will take some of the stress off and give you the confidence you need to make it out there mentally. The next part is exercise. You do not want to be in poor health when you find yourself in a survival situation. It’s only going to get worse as the days go on, and if you aren’t in the good health beforehand, it’s going to make things tougher. That stress and hurt is going to wear on you physically. Once the physical stress sets in, it starts eating away at your mental strength and keeping that will to survive gets harder to maintain. So eat right and exercise, and it will pay dividends if you find yourself in the suck. The final part of this equation is implementation. Having a strong will to survive is an active process. While the first two steps are physical factors that feed into the will to survive, this step is all mental. If you find yourself in a bad situation and you have to survive, there are things you have to actively do to keep your mental strength where it needs to be. You need to focus on the reasons you have to stay alive. While all of these may not apply, hopefully you can find one or two that work. Focus on your family, friends, loved ones, your faith in a higher power (if you are spiritual/religious), or even get stubborn and get to the point that you won’t let Mother Nature kill you. Heck, maybe your will to survive is fed by fears that your family and friends will find your stash of porn on your computer. Maybe you have dogs at home that need you to survive and you’re their only hope. Perhaps you just need to see the results of the next World Cup before you pass on. Whatever it is that keeps you wanting to live, grab a hold of it and don’t let go. Keep that idea in the forefront of your mind and don’t let it waver. If you with others, you all need to work together to keep one another up and willing to fight on. It’s going to suck. Survival isn’t fun. If you’re having fun surviving, then you’re camping. So you need to do everything humanly possible to endure that suck. Because once the will to survive goes, it doesn’t matter if you have a freshwater natural spring and a pizza joint right next to your survival location, you won’t make it. I’ve started watching television program called Naked and Afraid. It puts two survival experts together in a harsh environment without any clothes and only one survival tool apiece to help them. The pair then has to survive for 21 days. It becomes obvious when the participants lose their will to survive. They become depressed, they panic, and they usually end up tapping out and going home. An amazing story of survival goes to hiker, Aron Ralston who fell down a slot canyon in eastern Utah and got his arm trapped by a heavy boulder. Ralston spent five days pinned by the boulder until he decided that he needed to initiate his own rescue. Through an incredible will to survive, Ralston used a pocketknife to cut his own trapped arm off at the elbow and hike out to safety. Another amazing story of survival is the story of Steven Callahan. In 1982 Callahan set sail alone in a sailboat from the Canary Islands. During a bad storm, his boat sank and he found himself having to survive in a small inflatable life raft. Most of his supplies were gone, and he spent 76 days adrift in the Caribbean. He survived by keeping his mind occupied. Callahan divided his mind into two people, a captain and a crewmember, and accounts from his logbook show the two personalities. It kept him mentally alive and willing to survive. So how does this apply to writing? Simple, it’s this aspect of survival that you can really get deep into a character’s POV and let it shine. This will turn your reactive character into an active character that people can connect with. Focus on their will to survive and show the reader why they want to live. What’s driving their will to keep on fighting? Is it family? Vengeance perhaps? Who knows, but take the opportunity to show off some mad characterizations skills.
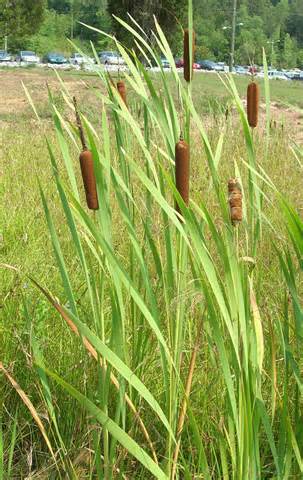
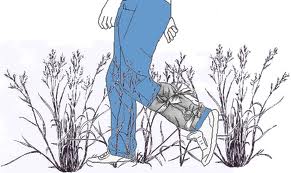
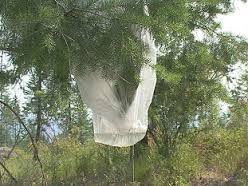
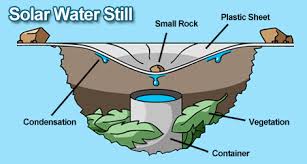
Don’t forget to vote on what you want me to cover in the bonus blog post. You can vote here! I’ll pick the top three topics and share some wisdom. If you don’t see a topic listed in the poll, go ahead and vote other and shoot me a message on what you’d like to know about. It’s been awhile, but I haven’t forgotten about the survival mini-series. Last time I talked to you about shelters. This time, we’re going deeper into survival and looking at food and water procurement. Shelter is very important for surviving in the wilds, but without food and water, it doesn’t mean anything. I found a lot of this information on the Internet and have provided links to some of the articles. Other information comes from my own Air Force survival instruction and knowledge. Let’s talk about food first. According to Dr. Alan D. Lieberson, a doctor who wrote an article for Scientific American, “The duration of survival without food is greatly influenced by factors such as body weight, genetic variation, other health considerations, and most importantly, the presence or absence of dehydration.” After doing some of my own research, I found a variable of about 10-30 days, but as Dr. Lieberson pointed out, it depends on each individual. While researching this very topic, I found a helpful little saying that brings it into perspective: Three minutes without air, three days without water, and three weeks without food. In any case, we need food to continue to thrive. When you start to starve, the body’s metabolism slows down and feelings of fatigue and a drop in mental acuity occur. Simple motor skills begin to shut down, hormone production is disrupted, and your will to survive goes away. As time goes on, the body begins to consume itself to survive which can lead to weight loss (the bad kind), organ damage, and eventually death. Therefore, food is absolutely necessary for continued survival. It doesn’t end there though, knowing what to eat and how to procure it can also be the difference between life and death. When it comes to surviving, you always have to play a game of risk management. Ask yourself, do the risks outweigh the gains? If so, maybe you might want to rethink your plan. In a long-term survival situation, calories count, so you don’t want to expend a lot of energy if you don’t have to. Hunting sounds great, but it may take a lot more energy than it’s worth; maybe climbing a tree for nuts isn’t worth the risk of injury. I’m not saying hunting game or climbing trees is out of the picture, I’m merely stating that you need to examine all the possibilities and come to an educated conclusion that fits your situation. As far as food goes, I’ll break it down to three areas: plants, insects, animals. Let’s take a look at the first area, plants. Plants are by far the easiest and possibly the most plentiful source of food you can find in the wild (depending on the area). However, plants can be just as dangerous as anything else, and I can’t stress enough the following fact: DO NOT EAT ANY PLANTS UNLESS YOU CAN POSITIVELY IDENTIFY WHAT YOU ARE EATING. There are some plants out there that are very toxic to humans, and they will make you sick or even kill you. There is an edibility test; however, it is time consuming and still contains risk. The best course of action is to educate yourself beforehand and know what plants are in the area you are traveling through. If you know before you go, you’ll have an idea what you can eat. I can’t stress this enough, you need to be educated on the types of local plants in your area because there are some poisonous look-alikes for safe plants, and unless you know what you are looking for, it could end up making a bad situation worse. Here are some warning signs of plants to avoid: thorns, shiny leaves, white/yellow berries, milky sap, bitter tastes, plants with leaves in groups of three, fine hairs, and plants with an almond scent. While this isn’t comprehensive, and there are some exceptions to this rule, it’s a good start. Mushrooms are a whole other beast, but follow the same rules, unless you know for a FACT that they are safe, don’t risk eating them. Here are some known goods that are easily identifiable. Cattails or punks are found near the edges of water sources. They have long stocks and brown “hot-dog” looking part at the top. Many parts of the plant are edible to include the brown part can be eaten in the earlier part of development. The roots can be boiled or eaten raw, as well as the stock and the leaves. Clovers are another plant that are edible. They can be eaten raw or boiled. Avoid eating these while pregnant. Dandelions are abundant and can be eaten. The entire plant is edible, although don’t eat the seeds. Also, eat the leaves before they mature otherwise you’ll have to boil them to avoid a bitter taste. If you live in an arid or desert climate, the prickly pear cactus can be eaten. Just be sure to remove the spines. The art of foraging plants is extensive and could take an entire book to cover. However, nothing beats hands on training. If there is a class in your area on foraging or identifying edible plants, take it. It could save your life one day. For now, we’re going to move on to insects. Insects are easy to find and can be highly nutritious. Many cultures survive on a diet of insects and plant all around the world, and if you can get over food aversions, you can also survive on this plentiful bounty. Much like plants though, you have to know what you are eating or you could get stung or poisoned. When searching for insects, look under rocks, logs, leaves, loose bark or under the dirt. Grasshoppers, crickets, ants, grubs, worms and larvae can be eaten. While most can be eaten raw, some are easier to eat after being cooked. During my training, one of my instructors said if it was much more than an inch long, cook it. Better safe than sorry, especially when it comes to aquatic insects. Avoid insects that are covered in fuzz, brightly colored, slow-moving in the open, and disease carrying (such as flies, and mosquitos). I’d also avoid stinging and known poisonous insects; while some are safe to eat, the risk of procurement may outweigh the gains. Use your best judgment. Finally, let’s talk about meat. If you are a vegan or vegetarian, then you might just want to skip this part and go straight to water procurement. In my opinion, nothing beats a hot meal when you’re surviving, and having cooked meat can help take the edge off of a bad situation. However, taking game in the field brings its own set of issues. Whether you trap, fish, or hunt an animal, you’re going to have to prepare it for eating. This generally means gutting, skinning, and cleaning the meat. I’m not going to get in to the methods of hunting, fishing and trapping, because that will be another article. I have provided some links below on the procurement and processing of game animals. First off, once you’ve killed something, you’re going to want to gut it as soon as possible. This helps cool the meat down to prevent spoilage. When it comes to meat, life begins at 40, or in this case, 40 degrees. Meat will spoil quickly at temps above 40 degrees, so it is vital to keep it cool. Be careful not to rupture the intestines when gutting the animal, this will contaminate the meat. You also want to try and keep the carcass clear of flies if possible. Flies carry disease and can transfer that disease to your meal. When you cook the meat, you want to make sure it is thoroughly cooked in order to kill any bugs or bacteria that may have called that meat home. A good rule of thumb, is if the meat looks discolored or smells funny, don’t eat it. Hunting can be very rewarding, but it can also be very taxing. You have to weigh the benefits to the calorie loss or risk. Also, if you kill a large animal, smoke the meat or turn it into jerky for long term use. A survival situation is the last place you want to be wasteful. Besides, you just killed that animal so you could survive, treat it with respect and use everything you can from its death. The next step of surviving is water procurement. Without water, you could die within three days. The body needs water to survive, and a lot of other functions depend on that water intake to function, to include eating. Don’t eat anything if you don’t have water. It takes water to digest food properly, and you could speed up the dehydration process by eating without water intake. Much like food, many factors go into figuring out how much water you need on a daily basis and how long you could actually survive without it. However, a good rule of thumb is that a person needs a gallon of water per day for intake and sanitation needs. Of course, you could get away with less, and probably will have to get away with less in a survival situation. External factors can play a big part in this as well; if it is extremely hot, or you are burning a lot of calories, then you’ll need more water. Dehydration can lead to heat exhaustion or heat stroke, swelling of the brain, seizures, low blood volume shock, kidney failure, and of course, death. Much like starvation, motor skills will slow or cease, headaches will occur, and the body will begin to shut down. There’s no good gauge for dehydration because everyone is different. If you’re feeling thirsty, you’re already dehydrated. The best bet is to watch the color of your urine. You want your urine to be a clear as possible; dark or yellow urine is a sign that you need more water. To re-hydrate, drink water and try to replace electrolytes if possible. Drinking water alone sometimes isn’t enough, and drinking too much water can be just as dangerous. Electrolytes are the key here. It pays dividends to have an electrolyte powder mix in your survival kit. If you don’t have that, there are many natural recipes that can replace the lost electrolytes. Do some research on what natural herbs and wild veggies grow in your area and know how to make them into a tea or broth. There are a number of ways to finding water in the wild. Of course, the finding a lake, stream, or pond is the easiest, but also require purification before consumption. Even if the river or stream is fast moving, don’t trust it. You don’t know what’s been in the water upstream, or what kind of bacteria lives in the water. When surviving, a debilitating stomach bug is the last thing you want to deal with. To purify water, boiling is your best method. Put the water in a metal container if possible, and boil for at least ten minutes. This will kill any of the bugs and bacteria in the water and render it safe to drink. If you can’t boil it, there are other methods such as: water purification tablets, iodine drops, or filtration. I've provided some links below on how some of these methods work, and it’s worth a look. Be prepared and take purification tablets and at least one other method of purification with you whenever you go out into the wild. They make some small filters now that are built into a straw that you can use on the go. A tiny thing like that can life or death. Now, on to the hard part, what if you are in an area that doesn't have a stream or other open water source? Don’t worry; there are methods of collecting water that you can still utilize to save your life. I’ll explain a couple of these methods, but remember that when it comes to survival, sometimes you think outside the box. The first method is simply collecting the morning dew off the tall grass or plants. Wrap clothing or a towel around your legs and walk through the tall vegetation in the early morning. The dew will saturate the cloth, which you can then wring out and drink. I wouldn't recommend this method if you think the area has been sprayed with a pesticide though; it will make the water off the plants undrinkable. The next method is a condensation or transpiration bag. I always pack a couple heavy duty plastic sacks with me when I go camping or hunting. You can take the bag and put it on a tree or bush with green vegetation. Let it sit in the sun for a few hours, and you’ll notice condensation collecting in the bag and pooling at the bottom of the bag. This method takes a while, but if you put a few bags out, it can provide you with enough water to keep you alive. The next method is referred to as a solar still. Dig a hole about 12 inches deep by 12 inches wide. You’ll need a sheet of plastic (again, a good reason to carry plastic sacks). Put a container centered at the bottom of the hole and then surround the container with green vegetation, and then cover the hole with plastics. Use rocks or something heavy to keep the plastic from falling in, and then place a couple of small stones at the center of the plastic sheet to weigh it down slightly. This method won’t produce much water, but some water is better than no water; plus, the water it produces is pure and will not need to be purified. Plus, as the method implies, it distills water, so it can be used near the ocean and will still produce drinkable water. http://basisgear.com/edible-wild-plants/
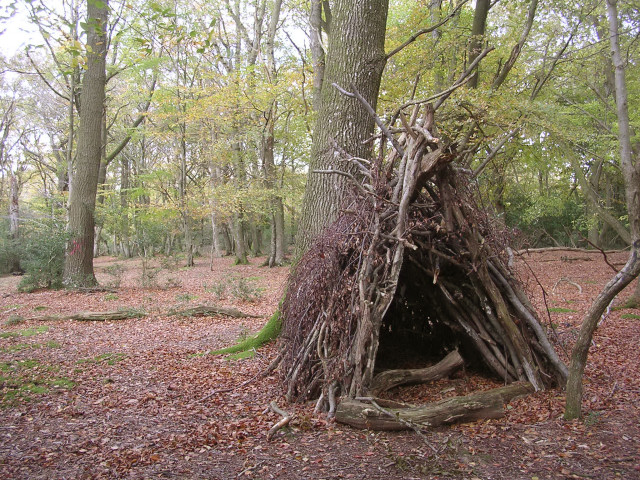
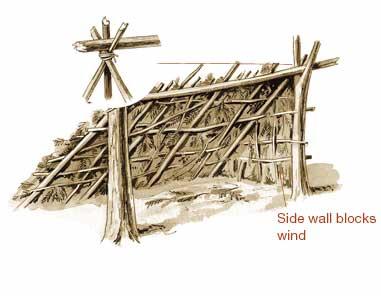
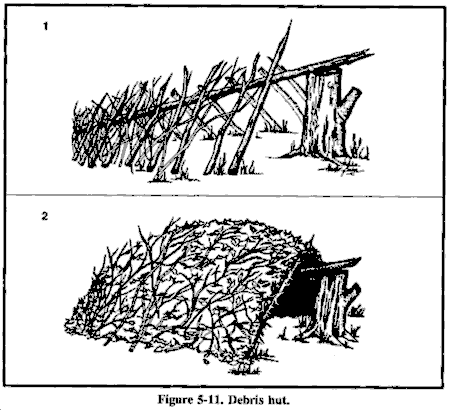
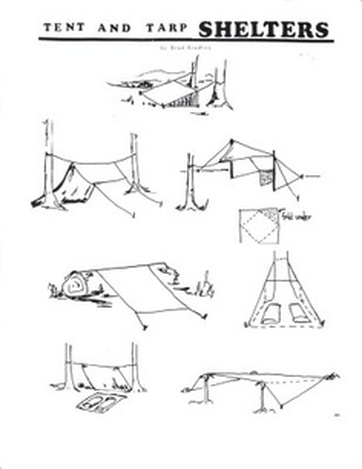
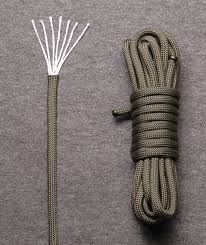
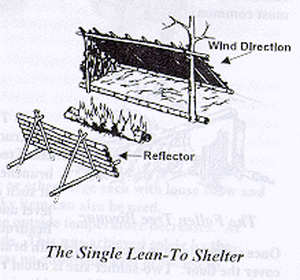
Hopefully this post provided you with some good information. It’s always a good idea to be prepared; take food and water with you when you go camping, hiking, or hunting. Have multiple methods of purifying water. Try and be in the best health you can be to make surviving easier. Most of all get educated and trained; I’ve said it before and needs to be repeated, but you have to try these methods out before the shit hits the fan. When you are actually surviving isn’t the time to be trying new things when you could have learned how to properly do those things in a controlled environment. Coming up next, The Will to Survive. Also, don’t forget to vote on what you want me to cover in the bonus blog post. You can vote here! I’ll pick the top three topics and share some wisdom. If you don’t see a topic listed in the poll, go ahead and vote other and shoot me a message on what you’d like to know about. Dr. Lieberson’s Article: http://www.scientificamerican.com/article/how-long-can-a-person-sur/ Edibility Test: http://www.wilderness-survival.net/plants-1.php#uet http://adventure.howstuffworks.com/universal-edibility-test.htm Plants: http://www.artofmanliness.com/2010/10/06/surviving-in-the-wild-19-common-edible-plants/ http://basisgear.com/edible-wild-plants/ Insects: http://www.fieldandstream.com/articles/survival/survival-food/2010/08/eating-insects-survival http://survival.outdoorlife.com/blogs/survivalist/2012/11/survival-skills-5-bugs-you-want-eat Animals: http://www.wilderness-survival.net/food-1.php http://www.wilderness-survival.net/food-5.php Water: http://www.wilderness-survival.net/water-1.php http://www.princeton.edu/~oa/manual/water.shtml Surviving in the wild takes a number of things to work. Even then, nothing is guaranteed. The basic tenants of survival are shelter followed by food and water. These feed into the most important factor; the will to survive. To start off, if you find yourself in a survival situation, you need to find shelter. Shelter is a must in certain climates, and can be more important than food or water. To keep things concise, I’m only going to talk about general survival and not escape and evasion (which changes things dramatically). I’m also going to examine survival in a moderate climate. Snow survival and desert survival deserves their own post. You might be asking yourself, why do I need a shelter? What if it’s just a nice sunny day, a warm 70 degrees and not a cloud in the sky? Here’s why. A shelter is necessary because it keeps us warm and/or cool, keeps can help keep the bugs at bay, and it can help add little comfort to an uncomfortable situation. Because let’s face it, survival isn’t camping. It isn’t fun, and each day that you find yourself in that kind of situation is going to be worse than the last. If my Air Force survival training taught me anything, it was that your health would degrade as the survival continued. You want to do everything you can to prolong comfort and the ability to live, and a shelter is going to help you with that very thing. Plus, who knows what the weather is going to be like in an hour? That cloudless day could turn into a rainstorm and leave you soaking wet. First and foremost, a shelter is going to help stave off hyper/hypothermia. The body’s temperature is generally around 98.6 degrees, too much of a shift in either direction (sometimes it only takes a raise or drop of 3-4 degrees), and basic functions are going to start to shut down. The shade will provide somewhere to cool down in extreme heat, and it will provide cover for wind, snow, and rain. You want to do everything in your power to maintain that core temperature. Once you start to lose or gain temperature, it can be difficult to get back to normal. To do the above things, the shelter needs to be insulating and small enough to reflect body heat. Yet, we don’t want it too small that it’s uncomfortable. This leads into the next part. What kind of shelters can you make? A shelter can be as easy as finding a cave or overhang (natural shelter), or dragging a bunch of sticks next to a rock face, to pulling out a tarp and making a make-shift tent (man-made shelter). I’m going to talk about some of the common basic shelters: Lean-to, Wedge, and Tarp/Poncho. Before you build a shelter, keep a couple of things in mind. Which direction is the wind coming from? It wouldn’t do to make the entrance to your shelter be same way the wind is blowing. It’s going to make for a blustery night. Is there water nearby? I wouldn’t’ suggest building too close to a lake or stream, who knows what’s going to happen while you are sleeping. A flash flood or heavy rain could cause the water to rise and the next thing you know, you’re swimming. What’s the wildlife situation? Do you need to build your shelter off the ground? Do you run the risk of predators moving in on you during the night? Keep these things in mind when you pick your spot. The lean-to shelter is a simple shelter to create. It can be made out of natural materials or man-made materials. Basically, all you need is two base poles, a supporting horizontal pole, and then smaller sticks to create the roof. You can then pack on dead leaves, grass, pine tree boughs or whatever to try and create something that will block out the wind and rain. The roof will act as a reflector for body heat or fire heat. If you couple this shelter with a fire-reflecting wall (see below), it can be quite warm. However, keep in mind, this shelter isn’t wonderful. If the wind shifts it can ruin the whole set-up and turn the shelter into something useless. The next shelter I want to talk about is the wedge. Similar to the lean-to, the wedge is very easy to make. It can be made of natural or man-made materials. It’s basically an A-frame type of shelter; one center beam is either lashed to a tree or pole, and then smaller sticks are placed along either side of the beam. You can use tree boughs or other debris, or a tarp to cover either side. This type of shelter will offer more protection than a lean-to, and will reflect more body heat. However, you’re limited on fire placement. The third shelter I want to talk about the tarp/poncho shelter. If you are going out into the wilderness, carrying a tarp and or a poncho is an invaluable asset. It will keep you dry, you can use it to make a bag or backpack if need be, and they make great shelters. With such an item, the lean-to or the wedge can be created in the same manner, just substitute the branches or boughs with the tarp. The key to the tarp shelter is cordage. You’re going to need something to tie the tarp down. I recommend 550 paracord. It’s light and very strong. Plus, if you need to, you can remove the smaller strings from the inside of the cord for more tying options. I highly recommend taking a poncho with you into the wild. They fold up very small, are lightweight, and can save your life if other shelter-building materials are in low supply. Finally, I want to address a fire reflector. A fire reflector is a wall of some sort. You can use a natural rock wall, make a wall out of sticks or stones (although be sure the stones are wet or placed far enough away, I’ve read that rocks can explode if heated up enough), or even use an emergency blanket (the silver ones that you always see in the store), just make sure you place the blanket far enough away from the fire so it won’t catch fire. The next step is to angle the reflector. Generally you will angle it 10-20 degrees from straight, and pointing away from your campsite. This will help reflect the heat in the right direction.
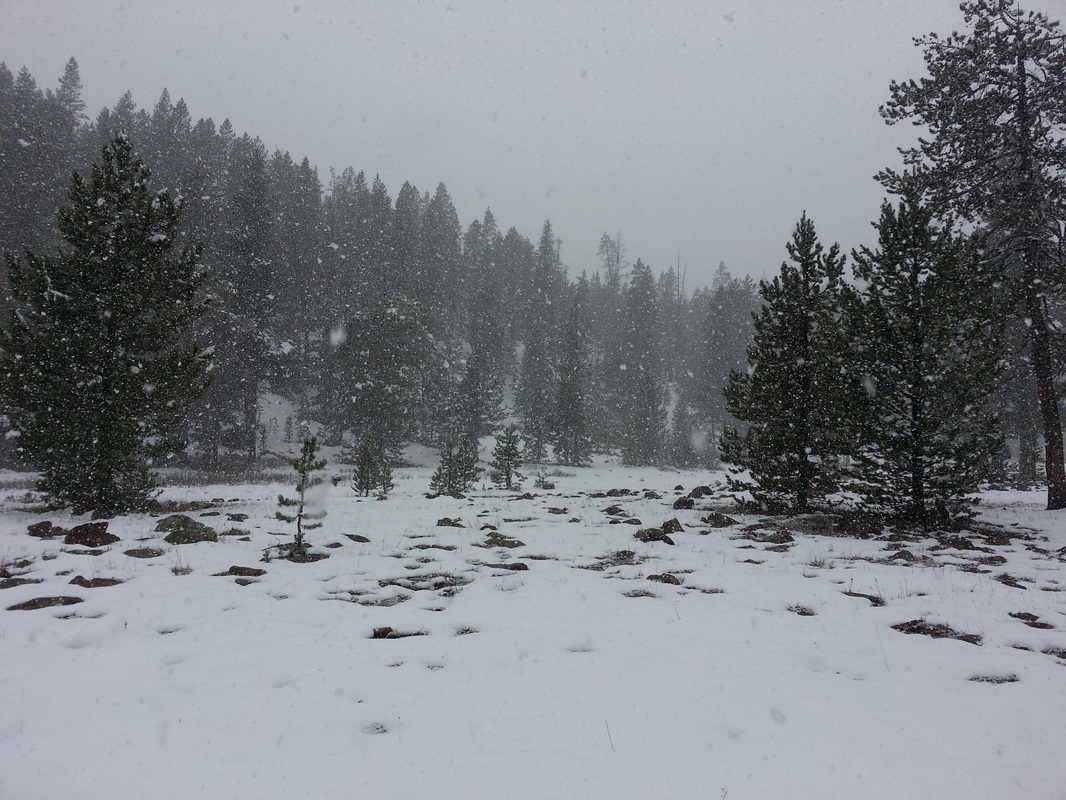
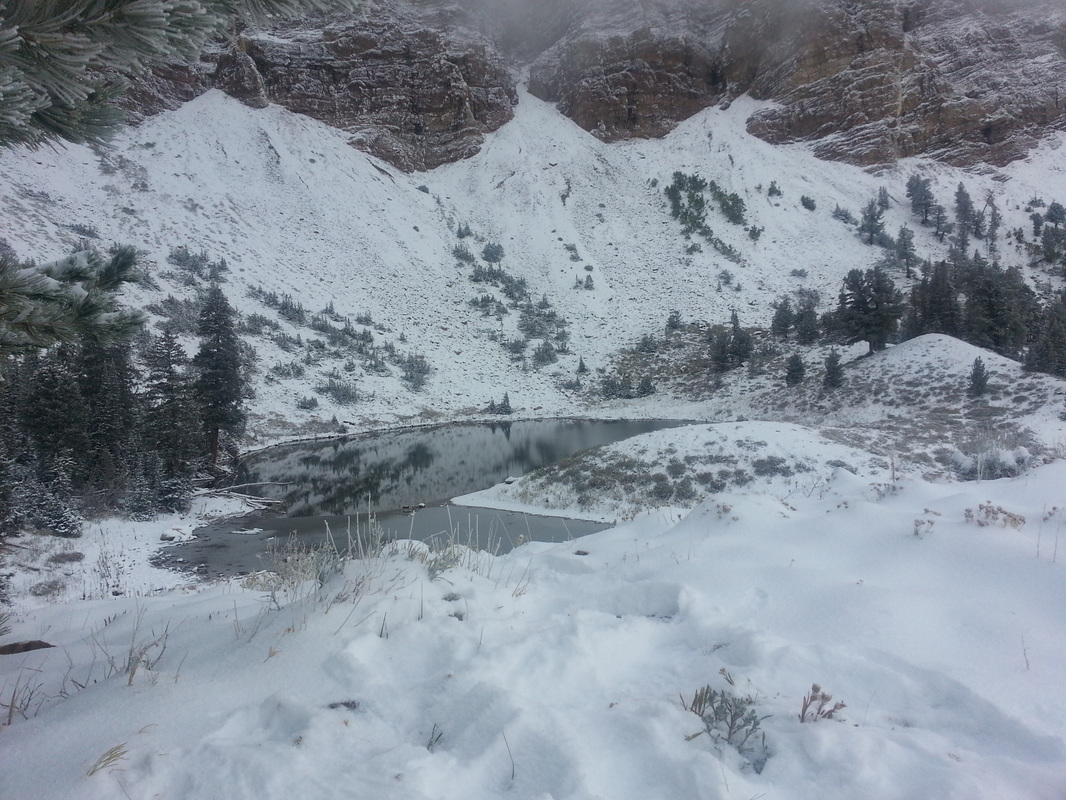
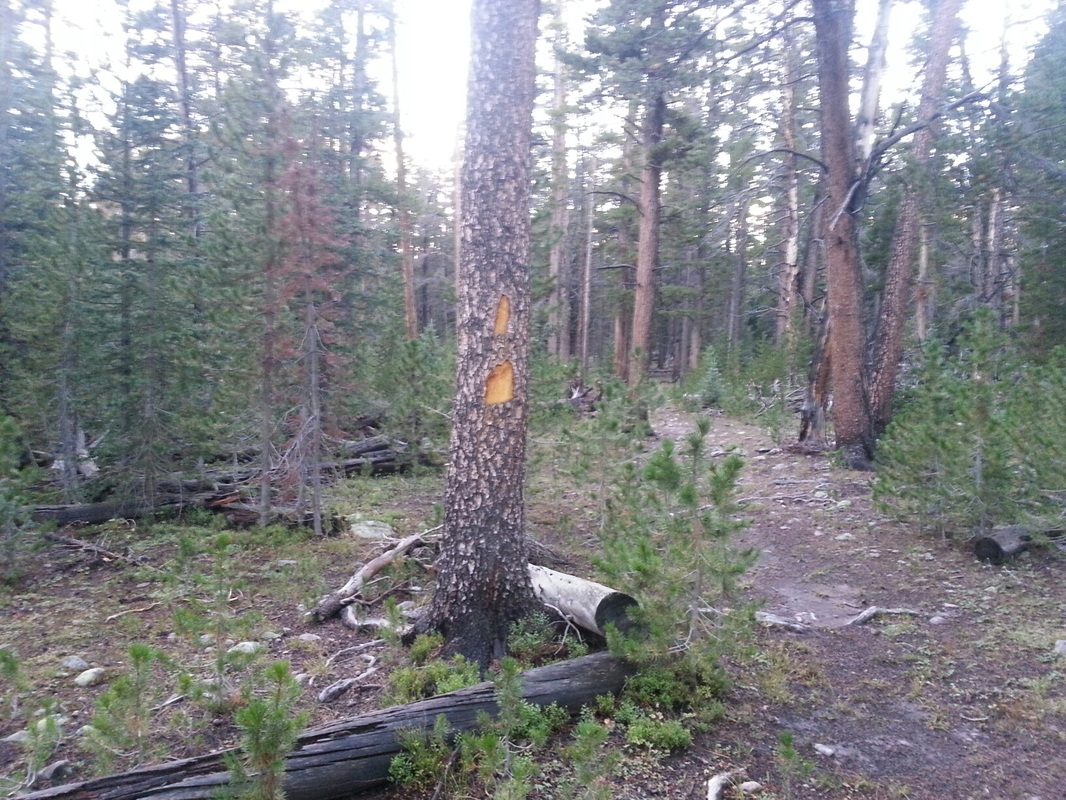
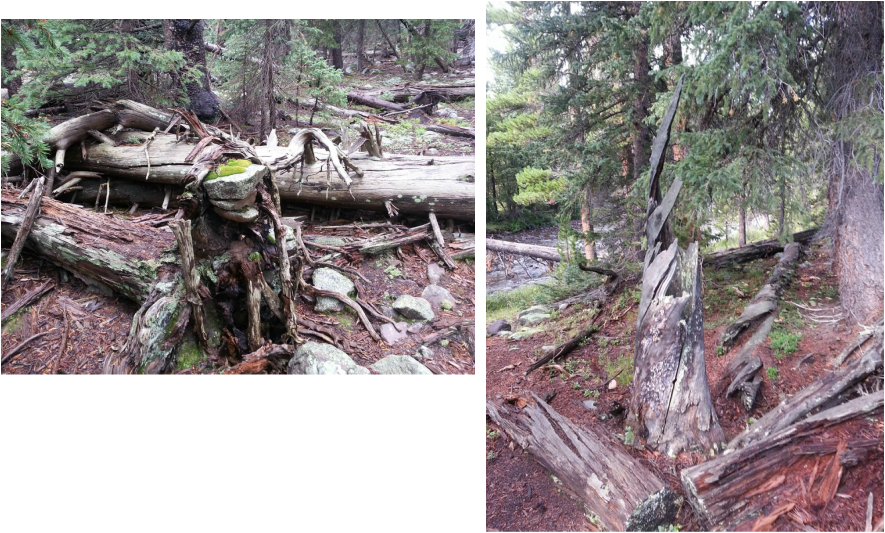
Below are some links to a couple of sites that talk about survival shelters in a little more detail. I also recommend practicing these techniques next time you are out camping. Practice makes perfect, and you don’t want to try this out for the first time in an actual survival situation. Up next, food and water procurement in a survival situation, followed by the will to survive. Remember, there is still time to vote on what you would like to see in the fourth installment. Go here and vote. http://crlangille.weebly.com/1/post/2014/02/survival-mini-series.html Feel free to vote on the other as well, just drop me comment on what that “other” is that you would like to know more about. http://www.practicalsurvivor.com/shelter http://www.wilderness-survival.net/shelters-2.php  I'm going to be writing a four-part mini-series on survival. Part 1 will be about shelter; how and why. Part 2 will be about food and water. Part 3 will be on the will to survive. That brings me to Part 4. Part 4 will be a bonus post where I'll discuss a few different topics. I want to cover topics that you, the readers, want to know about. Things that perhaps I didn't cover in the first three parts. Please vote below. I just put some topics there to get you started. If there is something you want me to talk about that isn't listed, feel free to put in in the "other" category. I'll pick the three most mentioned topics. You'll have until I'm finished with Part 3 to vote. I spent another night up in the Uintah Mountains. My goal—find elk. I failed. I didn't find any elk. However, I found elk sign (read poop), and I heard what I think could have been cow elk talking to one another (more on that later). First off, just because I failed at finding any elk, doesn't mean the trip was a total failure. One, I covered a lot of ground while I was out there. I probably hiked a good four miles and covered a lot of distance on my ATV. What did this serve? It let me become familiar with the terrain and the locations I wanted to hunt. It also helped me prepare for when I go back. I now know where I want to camp (with back-up locations just in case) and I have a half-a-dozen spots I think could be good to try and get a good shot at an elk. Two, I learned that I need to take something to mark my trail. Even though the trail was blazed with these markings (which was a life-saver), it was too dang easy to get lost. I went out twice on the same trail, and lost the same trail each time. You might think it’s easy, especially with the tree markings. Think again. Too many trees out there and that trail was grown over in a lot of spots. When I go back to hunt, I’ll tie small ribbons on the trees at regular intervals to mark my path. I figure I’ll be going out to the sweet spots in low-light to no-light, and having the trail marked could make or break the hunt. Three, just getting out into nature is a win all by itself. I love the outdoors. I could spend too much time out in the woods if I didn’t have obligations to pull me back. I got to test out my new pack as well as brush up on my land-navigation skills (yes, it will atrophy just like everything else). Plus, you get to find crazy things like this burnt out tree trunk and this hidden wood person. Will I fill my two elk tags? I don’t know. I do know that there are elk out there. I saw the sign, found wilderness that looked like great elk habitat, and I also heard a bunch of cows talking. Which, by the way sound like a pack of banshees wailing in a chorus. It happened in the morning while I was cooking my breakfast. Not more than a half mile from my camp, it started off as a kind of a cross between an elk bugle and child screaming. Within seconds many more of the same calls answered in a hellish chorus. Then they all died down to silence in about 40 seconds. Really kind of terrifying if you’ve never heard it before.
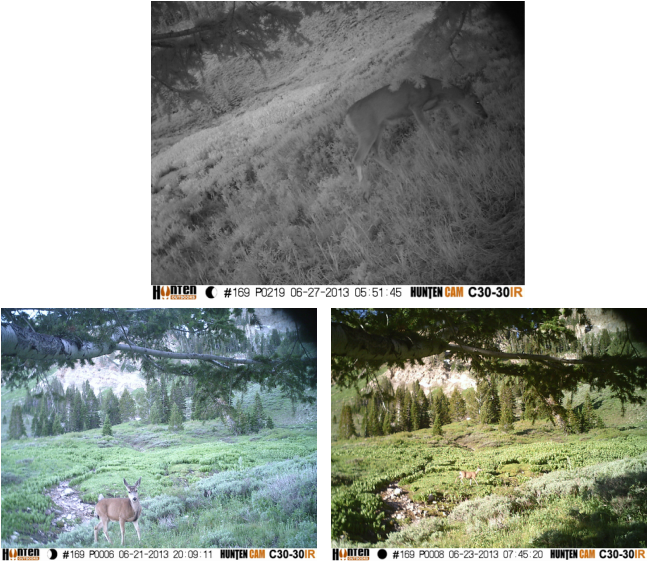
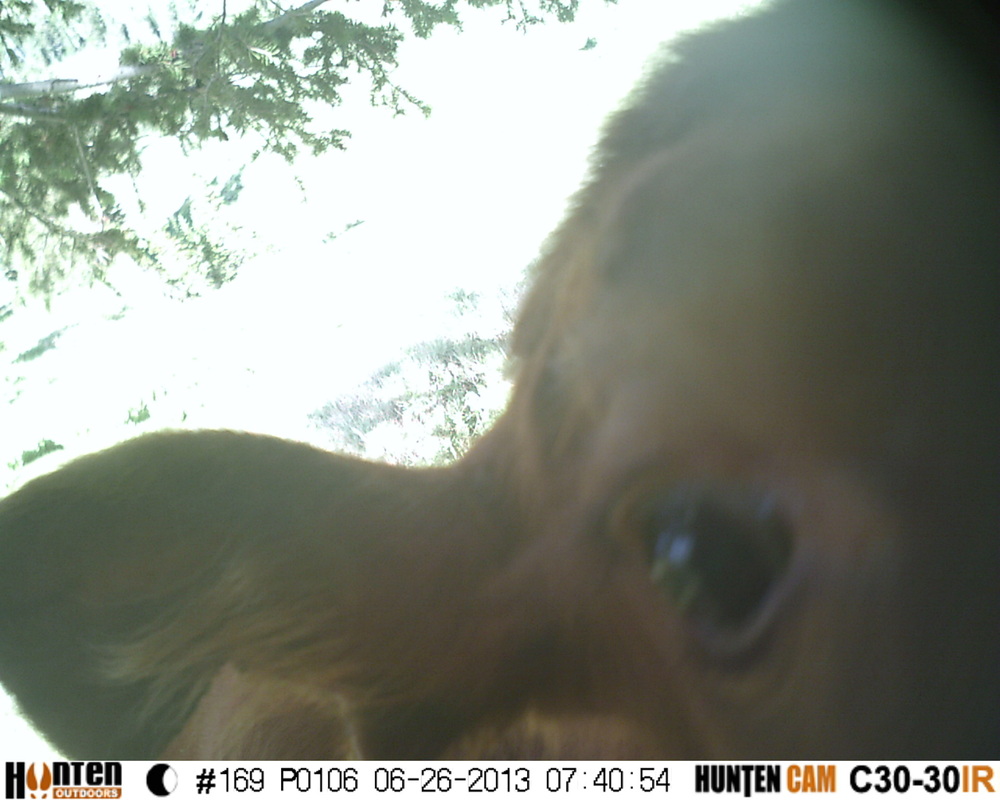
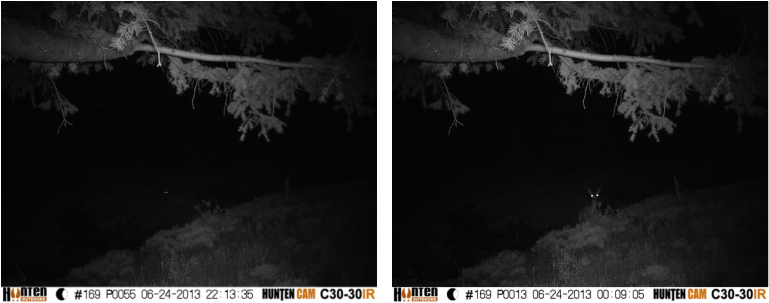
Elk are kind of sneaky bastards and this will be my second hunt. I’m somewhat flying by the seat of my pants again since I never did much elk hunting growing up. I’m working off what research I’ve done, advice from friends, and pure luck. We’ll see come October whether or not I’ll get lucky and have some meat for the freezer. Just a little under a week ago, I had the chance to head back up the mountain and retrieve the data from my trail camera. I had my ATV out of storage, a fresh SD card, and some new batteries. After work, I got my things together and headed out. I knew time was going to be a factor even with the longer summer days, so I didn't dink around. I found the spot to park, unloaded the ATV and headed up the mountain. It only took a little over 30 minutes to make it to the trail head with the ATV, which beats the 1.5 hours it took to hike up there last time. Here's a note to the wise on a matter of survival. Conditioning is key. Last time I hiked up the mountain, I hiked further. This time, it was probably 3/4 of a mile up and I got my ass kicked. The difference? Due to school and a trip to Vegas for a grappling tournament, I hadn't run for two weeks. In those measly two weeks, I lost a lot of conditioning and I could feel it. You always want to keep up on exercise. When the shit hits the fan isn't the time to take up a new exercise routine. Needless to say, when I go back up there, and definitely when the hunt rolls around, I'll be ready. On my way up, I saw a few doe as well as a couple of cows (not elk, regular cows). That should have been the first tip-off that something wasn't right. I made my way to the trail camera and found it pushed from its original position that it was pointed directly at the trunk of a nearby tree. Sabotage! I was pissed and thought that someone had come up here, saw the camera, and decided to sabotage it. In a way, I was correct. Curious to see what happened, I opened my laptop and threw the SD card in. The first few pictures were alright and included a couple captures of a deer. The saboteurs of my trail camera were revealed! Cows! A bunch of 'effin' cows decided to come by and eat the salt lick. At some point, I think these cows caught on that they were being recorded. They must have been listening to the current events and thought that maybe the NSA was spying on them. Well one cow didn't think that was cool and decided to shut down my deer spying operations. After that, all I had was about twenty pictures of the tree trunk. Chalking it up to a learning experience, I changed the SD card, switched the batteries and headed further up the mountain. I found a game trail on the hillside and planted the trail cam there, along with the remaining half of the salt lick. I'll go back up in a couple weeks and see if I have something more to show for my efforts than 300 hundred pictures of paranoid cows. Before I left though, I saw a buck which kept my hopes up. Means I've seen buck deer every time I've ventured up that way.
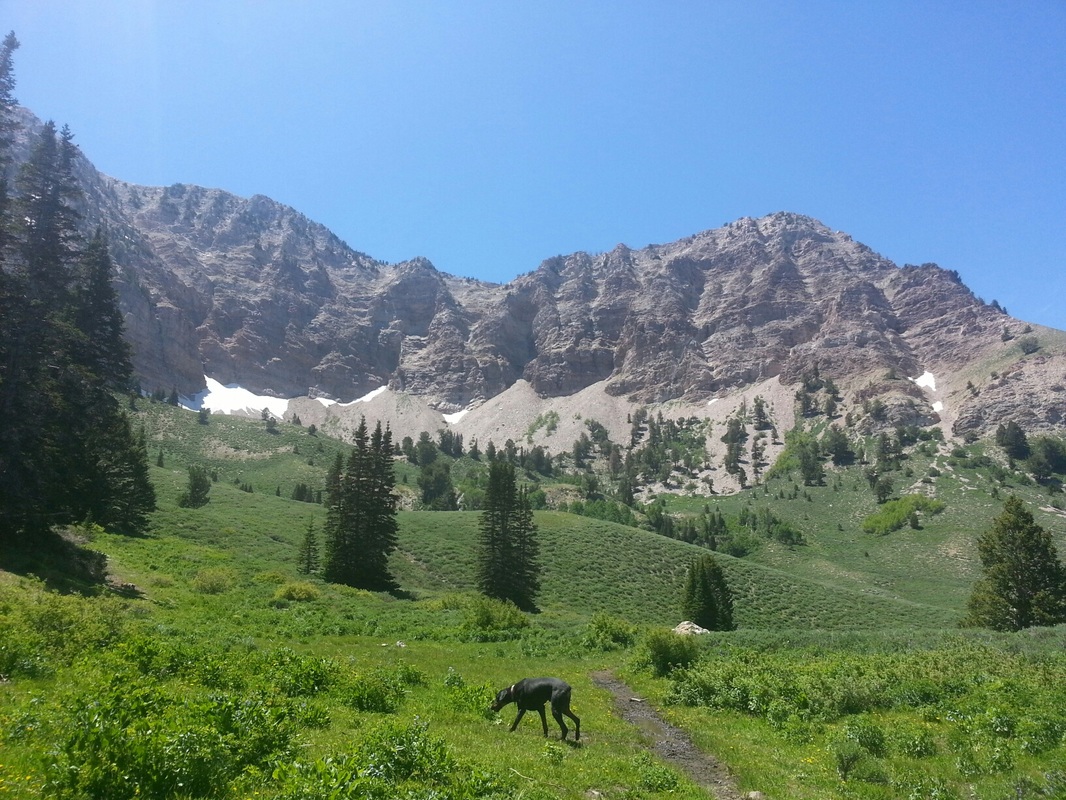
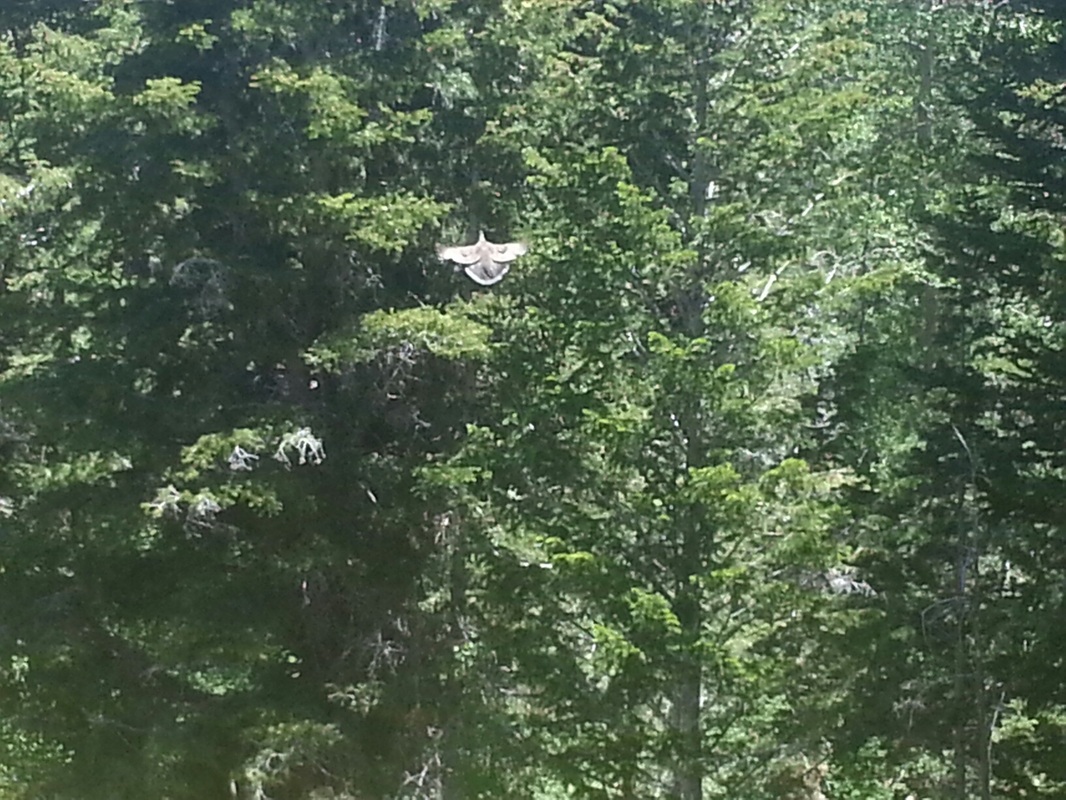
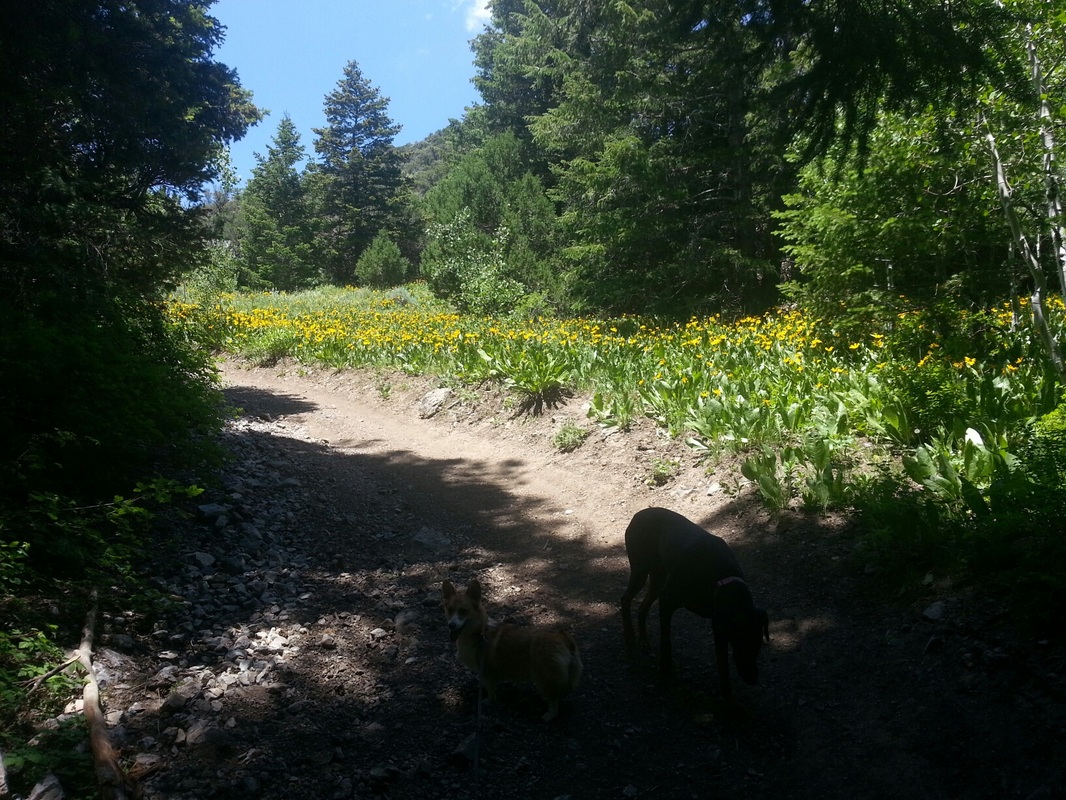
There was something else on my camera. Something dark and nefarious. It only caught a glimpse of the creature. Some sort of robot deer, or perhaps a Rocky Mountain chupacabra. I did a little pre-season scouting the other day. I know, it's still early, but I had some free time and I wanted to take advantage of it. My dad and I met up around eleven and headed out. I decided to take my dogs so they could get some outdoor time and a exercise. I took a day pack with me, which consisted of a Camelback, two bottles of water for the dogs, a granola bar, some fruit, a first aid kit, matches, lighter, TP, hand sanitizer, water purification tablets, trail camera, and a salt lick. I'd gotten directions and descriptions from a friend at work who had haunted the area,and after double checking the map, we were off. I knew we were in for some hiking, and it turned out to be more than I expected, but it was beautiful country. It ended up being about two, maybe two and half miles up to the top. About a mile up I got confirmation of deer when a buck stood up twenty yards away and we locked eyes. The moment I moved for my camera, it bolted. I was still growing in its antlers, so hard to tell how big it was, but it was a good size buck. I spooked another one close to the same size near the top. Oni, my Doberman, flushed a pine hen which I was able to get a picture of. Once we it the top, I found a spot to drop my trail cam. It was off the beaten path and in a good spot, at least I hope it was. I'll trek back up there in a week or two and retrieve it, so look forward to some pics of what it captured.
Things I learned: I need to get my ATV out for the next trek, it would have shaved a lot of time and sweat off the venture. Also, in order to effectively hunt the area, I'll need to drive the ATV up to the trailhead and camp. Thant way I will have enough time to get no and get into place before the sun comes up. The next step after getting my trail camera back, will be camping up there. That way I can observe the deer movement in the morning and evening and get a good feel for what they are doing. I'll probably wait until later in the season for that though. I drew out a buck deer tag this year for the Stansbury-Oquirrh range in Utah. I've decided I'll run a string of blog posts that show what I do to get ready, my scouting adventures, and of course, the hunt itself. I've applied for some antlerless elk tags as well, so that may make it into the mix. Stay tuned for the first post coming soon!
Guns are getting a lot of attention from the media these days. Not just attention, but negative attention. This post isn't designed to be a political stance. Those of you who know me, probably know my views on firearms, those of you who don't, will probably be able to guess by the end of this post. What I want to talk about, is guns, their uses in real life, as well as some tips on how to write about characters using or packing guns in your stories. Before we get started, please keep in mind, these are my own opinions and experiences, I am by no means an expert or the final say on any of this. This is going to be a long journey, so strap in.
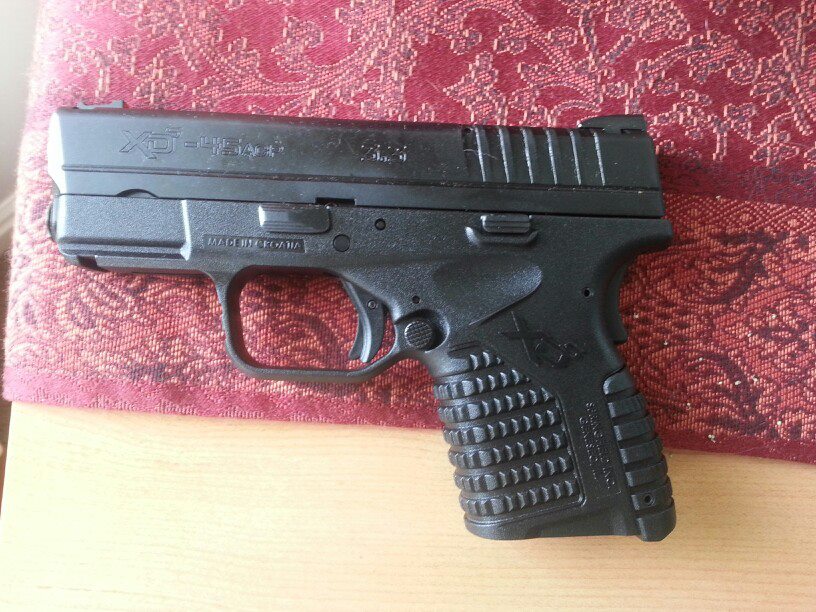
Guns for self-defense. This is one of the major reasons why some people own and carry guns. I've heard the saying, "I'd rather have it and not need it, than need it and not have it." When you're picking a gun for self-defense, you have to ask yourself a couple of questions. Where am I going to keep the gun? Is it something I'm going to pack with me on a daily basis? If so, do I want a semi-auto or a revolver? What caliber do I want? Or is it something that's just going to stay in the house? If you are going to keep it in the house, how are you going to store it? Locked up, by the bed, in a safe? Loaded or unloaded? Shotgun, pistol or rifle? As you can see, it's not as simple as saying, "I want a gun for self-defense." So let's delve into this a little. First, we'll start with a self-defense weapon for carrying. Before you start packing a weapon, know the laws of your state. Some states are very restrictive with the owning of firearms, while others basically want you to have a fully stocked arsenal at your fingertips. There are plenty of resources out there online, just look up the law and know before you tote. When you decide you want to pack a weapon on your person for self-defense, you will more than likely need to obtain a conceal carry permit. Not all states allow it, and as mentioned before, some states will make it such a pain in the ass that most people will just forego the trouble. Certain states allow what's called an open carry, which means the weapon must be exposed. This presents its own freedoms and troubles. While open carry is legal in some places, it can cause a disturbance. Remember, if you are in a place of business and they ask you to leave because you are carrying a weapon, you have to leave. It's the law. After you decide how you want to carry, it's time to decide what you want to carry. Revolver, or semi-auto. Revolvers are great because they are uber-reliable. They have less moving parts than a semi-auto, so there is less of a chance that they will jam. The drawback of this choice, is that they generally only hold five or six rounds where a semi-auto, depending on the caliber, may hold as many as 19. Speaking of caliber, I would suggest if you want to carry a weapon, you go to a gun range and test out different types to see what works best for you. You might want to carry a hand-sized cannon that shoots a .50 caliber bullet, only to find that it's too unwieldy to shoot, or even too heavy to comfortably carry for extended periods of time. Once you decide on your weapon and caliber of choice, practice with it. Practice, practice, practice. If you can't shoot the weapon accurately, and operate all of its parts with confidence, then you have no business taking that gun into public. This practice doesn't just mean shooting practice, you need to train at drawing the weapon from its carry position. All the shooting in the world won't mean diddly if you can't draw it and use it. For this type of training, I suggest you purchase what's called a snap cap dummy round in the same caliber as the weapon. The dummy is generally made of plastic, and has a soft section where the primer would be. That way you can train with trigger pull and not wear out the internal parts of the gun. Put the snap cap in the gun, holster it, and practice drawing and firing in this manner. Get to where the action is smooth and natural. Second, let's talk about guns for the home. Your choice of weapons just expanded. Now we can put rifles and shotguns into the mix if we want. Shotguns are great, they are the point-and-click weapon. With the right shell and load set-up, in the tighter confines of a house, it's hard to miss what you're shooting at. Plus, if you have a pump-action shotgun, the sound alone can be a deterrent to any would-be attacker. Rifles are neat because they can pack a lot of punch. However, that same punch can put a whole through your house and into your neighbor's house if you aren't careful. Keep these things in mind when choosing what kind of bullets to shoot for a home defense weapon. Drywall isn't good at stopping bullets. It would be a sad day if you shot at an attacker, missed, and ended up killing or wounding a loved one in the next room (always know what's behind your target before pulling the trigger). The next thing you want to consider, is how you are going to store that weapon in the house. If you have children, it's a no-brainer. Lock it up. There are so many options these days to store your weapons securely that there is no excuse for this. Even if you don't have children, it's a good idea to lock a weapon up. I read an article that stated keeping a loaded weapon within easy reach of the bed was a bad idea. If you get woken up and are still sleepy or groggy, perhaps it isn't the best thing to go grabbing for a gun. If it's locked up or away from the bed, that gives your body the chance to wake up a little, giving you better judgment before using the weapon. If you do leave it out, unsecured, remember to put it away if you have a party, or people over. And please, for the love of all that's grand, teach your children about gun safety. Now, how does all this translate into writing? All the questions and scenarios above, are something your character is going to have to decide. Also, when I'm carrying a gun, it's always on my mind. I'm self-conscious as to whether or not the gun is showing, or printing (able to see the shape through clothing). I can feel the weight at all times. My situational awareness increases. When I carry, I know that I am mentally prepared to use the weapon if need be. That's another aspect your character is going to have to deal with. I was taught that I never pull that weapon out unless it's time to use it. It's not meant to threaten or bully, but it's meant to protect my loved ones and me from someone who's intent on hurting or killing us (which means you're probably hurting or killing them, are you prepared?). Is your character ready for that? Are they comfortable around guns? Have they ever shot the gun? All these things will weigh down on your character's thoughts. |
AuthorC.R. Langille writes horror, fantasy, urban-fantasy, dark fantasy, and is considering stepping into the sci-fi realm. He has a grasp of survival techniques, and has been a table-top gamer for over 16 years. Archives
August 2023
Categories
All
|


 RSS Feed